
Did you know that linen jersey was even a thing? It’s an unusual fabric which you don’t see often, we all know knits are available in most other fibre types-cotton, wool, silk or man-mades for example- but I’ve never worked with it before so when Liana invited me to sew my next Lamazi project using it, and to pass on any hints and tips for sewing it, I was up for the challenge.

This 100% linen jersey comes from Mind the Maker in a range of colours and I picked the Dry Mustard shade which is a lovely vibrant ochre. The fabric has a beautiful lustrous sheen on the right side, the reverse is duller so it makes it much easier to tell the difference between the two. It has lovely light drapey quality too and is slightly sheer.
Linen fabric is not a textile known for its inherent stretch qualities and this jersey does feel slightly different from other knits because it has only a small amount of stretch along its length and quite a lot of stretch across the width but it has very little recovery so once it’s been stretched out it will stay like that at least until it’s washed again. During construction the application of plenty of steam will encourage some of this accidental stretching to be eased back into position so, coupled with its sheerness, this means that you need to think carefully about what garment to sew with it.

The properties of linen fabric itself [cool in warm weather, warm in cold weather] mean that it would be ideal for loose-fitting leisure or exercise wear, for yoga or Pilates for example. I would definitely say it’s better to avoid anything that is particularly close fitting because areas like the elbows or wrists would become stretched or baggy with little recovery. However the fabric has a lovely drape and its fine gauge allows it to be gathered up successfully so these properties could be exploited instead.
Bearing all these factors in mind I decided to make (another) Sewing Revival Heron dress which I would hack into a blouse. The pattern has a neckline which is gathered using elastic along with raglan sleeves with deep elasticated cuffs. To mix it up further I decided to pull the hemline in onto elastic rather than have a wide smock silhouette.
First things first, I washed the fabric by hand to remove any risk of excessive shrinkage or twisting in the machine. If you want to wash it in the machine then it might be an idea to overlock the cut ends together first to form a long loop and place it into a large washing bag to protect it further. Alternatively you could press it on your ironing board with plenty of steam instead. If at all possible it is better to dry the fabric flat, and certainly don’t wring or twist it. All of this might sound off-putting, and it is clearly not as straightforward as chucking a nice stable cotton into the machine but this is a luxurious fabric and deserves to be treated and handled carefully in the preparation. When it comes to cutting out your pattern pieces lay the fabric as flat as possible, handle it gently and don’t pull it about too much, especially if you decide to fold it. I made a whole back pattern piece for my top so that I could cut it flat, another appeal of the Heron pattern for me is that it has just three pieces so it’s a relatively quick sew usually.
After cutting all the pieces the first thing I did was stabilise all the raglan shoulder seams using some iron-on seam tape, I did this to prevent any unwanted stretching before I sewed the sleeves in later on. I added small squares of iron-on interfacing to reinforce the bottom of the opening on the centre front seam too. I also decided to press all the folded parts of the casings/ruffles for the neckline, sleeves and hem before sewing anything together, just so that I was handling the cut-out pieces as little as possible, again to prevent unwanted stretching before they got joined together. I also tacked these folded parts into position temporarily. All this might sound excessive but I wasn’t in a rush, and I found the slow and considered processes very soothing at quite a difficult time.


the pinned raglan seams showing the slight excess to be absorbed 
the finished seams inside the garment
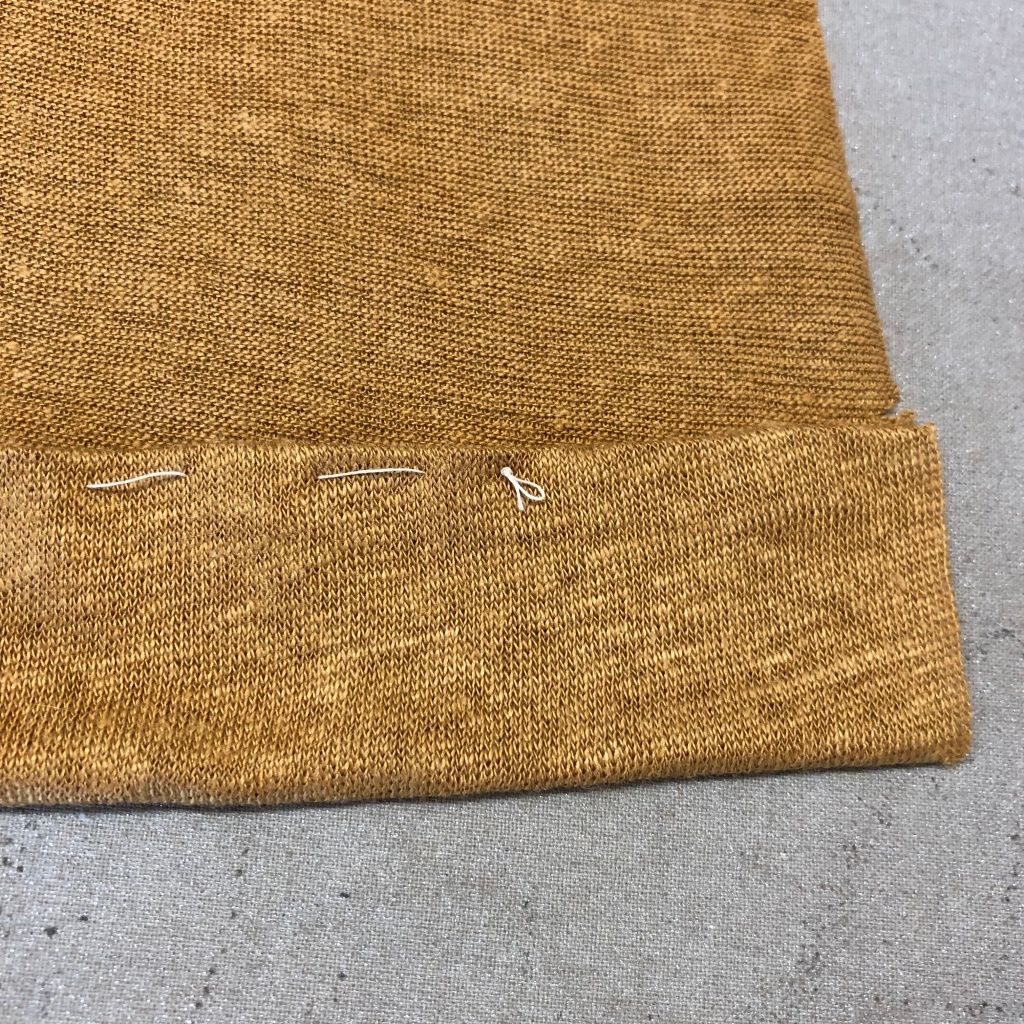

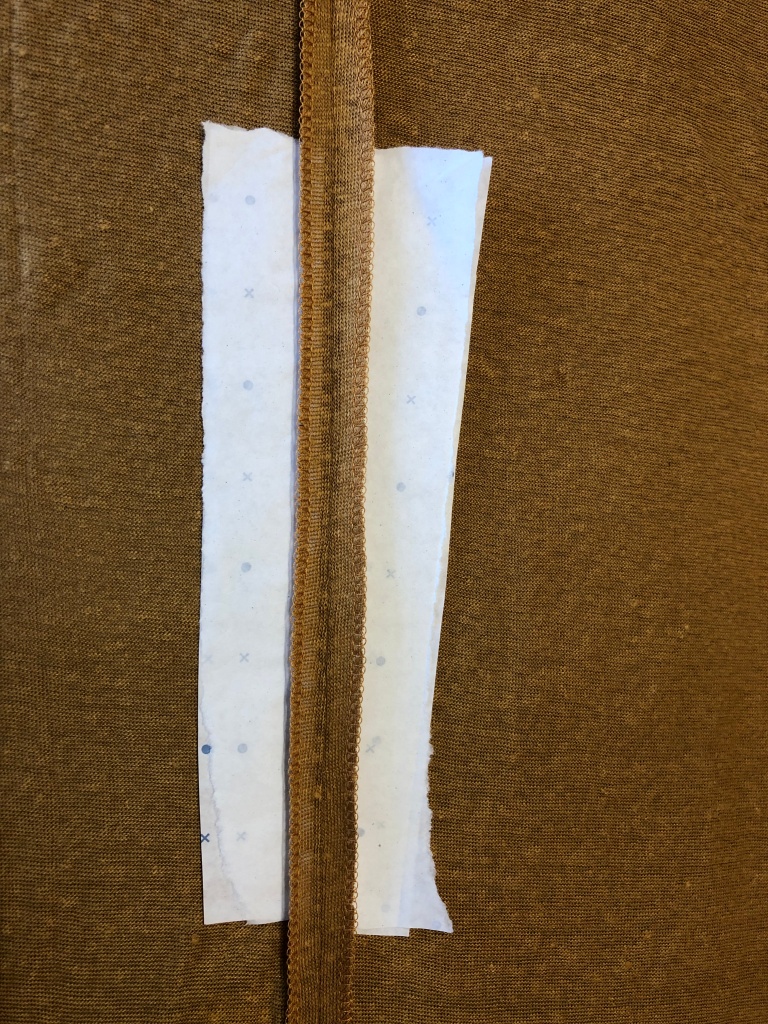
Something else I did before commencing was check on fabric scraps which needle and stitch-type would give me the best results. A ballpoint needle suitable for stretch/knits/jersey is essential to prevent snagging which could lead to laddering of this delicate fabric, and I found a short straight stitch was better than a narrow zigzag but you must do what works best on your own machine. You could sew a garment together entirely on an overlocker but be aware of the lack of rebound this fabric has so if it gets stretched or misshapen while it’s being sewn then it’s probably like that permanently. I also tested the overlocker finish before diving in for the same reasons. If you don’t have an overlocker this fabric is fine enough that where possible you could probably sew self-neatening French seams, or a wide zigzag might work but just be careful it doesn’t chew up the edges. If you have an overlock stitch option on your sewing machine and/or a special foot to sew an overlock-style stitch then definitely use them. Test all options before making your choice, the time taken could save you upsets later on. I slipped some folded strips of paper underneath the seam allowances when I pressed them to minimise any chance of the seam showing through on the front

If you have a walking foot for your machine this is definitely a fabric worth using it for, even if you don’t it’s a good idea to use plenty of pins. I’m not a fan of mini-clips because I think they are too heavy and get in the way, this fabric is lightweight and I think mini-clips could distort it while you’re sewing but it’s up to you. Tacking seams is always an option too of course, any technique that prevents the fabric shifting while you sew basically.
If you’ve followed my blog for a while you’ll know I’ve made a few Herons before so the construction was straightforward, the only area I did differently was to create the ruffled hem with a wide elastic casing. I couldn’t decide between my planned 2cms or 1cm wide elastic initially so I tested with the two widths to see which I preferred-I chose to stay with the 2cms width as planned.


To sum up, I’m really pleased with how my first experience of sewing with linen jersey has gone, I’ll admit I was a little nervous because Liana was putting her trust in me with an expensive fabric but taking the time to plan and test, and use my existing knowledge of working with knits definitely helped. Because of the sheerness of the fabric Lamazi also provided me with a metre of Atelier Brunette crepe viscose in Ochre to make a camisole to wear underneath, I used the Simone camisole and trousers pattern by Maven which is a very quick make and a very useful garment to wear on its own or underneath other garments. The crepe viscose is a beautiful quality fabric with lovely handle and drape but be aware that there’s a disappointing amount of creasing, you might want to take that into account when planning, for example if you’re making something you’ll spend a lot of time sitting in.


As always, I hope you find my hints and tips helpful if you choose this lovely fabric, I wouldn’t recommend it to a novice sewer because some experience of sewing with other similar fabrics is definitely an advantage, plus it would be shame to end up with a costly mistake, but if you’re looking for a new challenge to add to your repertoire this could be a good start. I’ll launder the finished garment either by hand or in a wash bag on a gentle cycle in the machine. I’ll dry it flat too and store it that way, I don’t want a coat hanger to make it misshapen. If you’re a person who prefers not to worry too much about their clothes or their maintenance then this might strike you as overkill, and that’s fair enough, but I don’t think it hurts to have a few special things in our wardrobes which were worth the effort to make for ourselves.
I’m looking forward to wearing this top as autumn is fast approaching (did summer ever arrive!?) thank you to Lamazi for providing me with the fabric to review.
Until next time, happy sewing,
Sue

Very interesting post, Sue – I wish I had read this before making a raglanT out of the beautiful green linen jersey I have – I thought it would be OK, but the neckline is too large and I need to go back and fix it, and it fits weird though the ones I have made in other jersey’s are fine! Lesson learnt, and great tips here, thank you!
LikeLiked by 1 person
I love linen jersey for its drape and texture but I found it’s pretty delicate – great idea to handle with care.
LikeLiked by 1 person
I haven’t heard of this fabric so thank you very much for explaining it and how to work with it. Love your finished top and the way the fabric drapes.
LikeLike