
I haven’t written a Simple Sew blog post for a few months but now that Sam Sterken has taken over with the organisation whilst Gabby is having her maternity leave we’re up and running again.
I had a bit of an idea in my head of what I’d like to do using the Zoe pattern which I already had so I chose some medium-weight enzyme washed linen in dark turquoise generously provided for us once again by Doughty’s Fabrics. I was really pleased with it when it arrived as it wasn’t too droopy but not over-firm either. Incidentally, it’s been terrible to photograph accurately, the final outdoor photos are definitely the closest to the real thing [to see how I altered the Zoe neckline so it wasn’t so wide have a look at my previous blog post in early 2018)
I drew a few sketches of ideas which all involved using the top half of the Zoe-initially I was going to extend the sleeves with wide pleated frills and keep the dress straight but I went off that idea as I felt the fabric was too firm for how I wanted it, I thought it would definitely work well with a peg-top skirt instead however. I wanted a shape that wasn’t too voluminous at the hem and by using an inverted A-line shape I could add pleats at the top but keep the hemline slimmer.

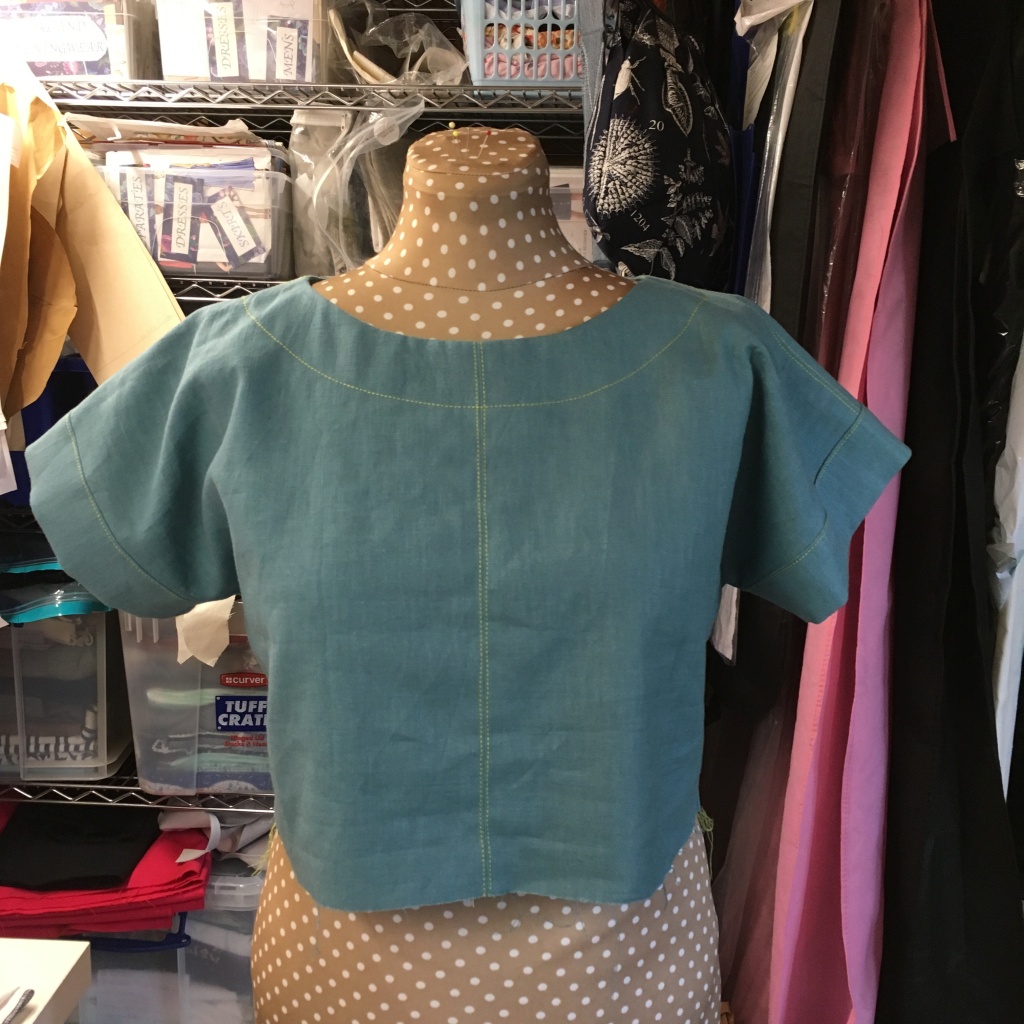
I tried on one of my existing Zoes (I’ve made 3) so I could assess what length I wanted the top section, and took an arbitrary measurement of 34cms from the centre of the front neckline to where I wanted the waist, which is slightly higher than my natural waistline. As the Zoe has centre front and back seams I then measured from the top edge down to the point where I wanted the waist seam and drew a line at a right angle on the pattern across from that point. I took that line across to the side seam but at the point where the line met the side seam I made it a right angle, which creates a very slight curve on the line. Because the back neck sits a little higher than the front I matched the side seams to one another first and created a similar line across to meet the centre back seam. [It’s important that these lines are at a right angle where they meet at the side seams because otherwise you would have a slight V shape rather than a smooth line from front to back]
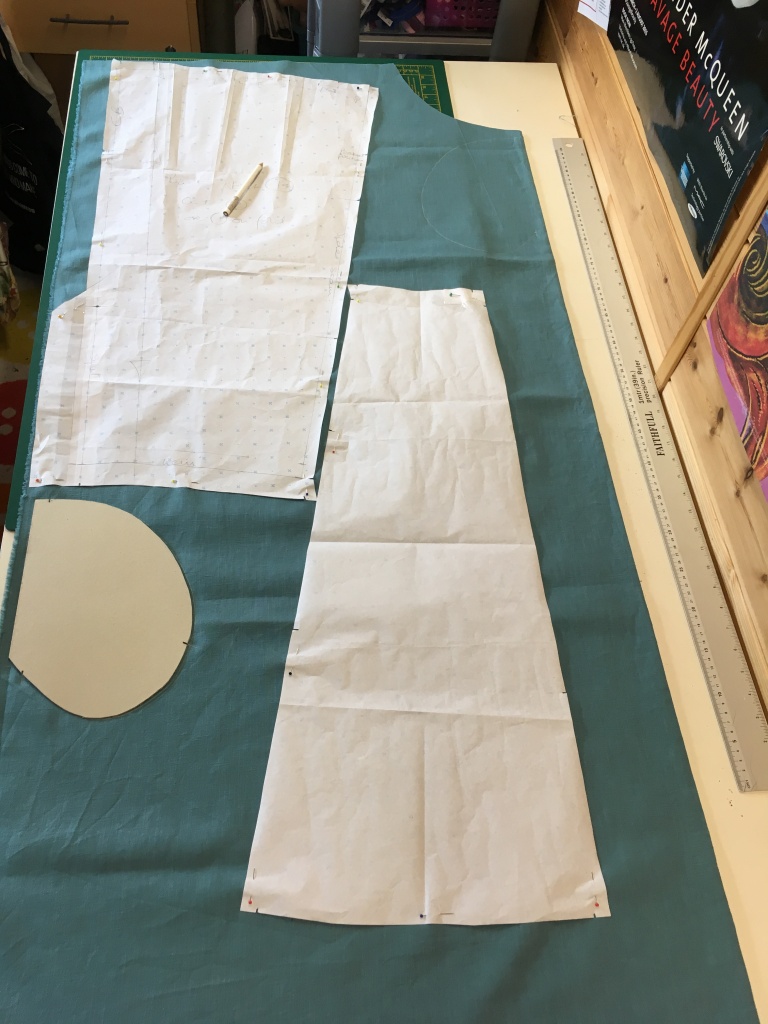
I already have a skirt pattern that I’d drafted last year for a similar peg-top shape, it’s essentially an upside down A-line skirt (the hem becomes the waist and the waist becomes the hem) I’d used it gathered though and I wanted pleats on the new dress. Initially I attempted to work out how to get 3 even sized pleats by folding and refolding the paper but I couldn’t quite get it. In the end I decided to cut the pieces in fabric as they were-with a slight modification for the front skirt as that piece was quite different-and then I’d work out the pleats once I was ready to attach the bodice and skirt together.
I cut all the bodice/sleeve/neck facings and assembled the bodice first. I’ve found that it’s easier to sew up the shoulders and attach the neck facings as described in the instructions but then attach the sleeves with the bodice open flat before sewing the side seams rather than in the round. The photos should help make this method quite clear. I added rows of contrast triple straight stitch to various seams as I went including around the neck [I used the quilting guide which came with my machine to do this accurately]


Next I cut the front and back skirts from the remaining fabric, plus I also cut two pairs of pockets for the side seams using the cardboard template I’ve made. [Just choose a pocket pattern that suits the size and shape that you mostly use to go in side seams and then make a cardboard version, mark the grainline and then all you need to do in future is place it on your fabric and draw around it with a pencil or chalk, it saves a paper piece getting scrappier and scrappier with constant use.]

I made up the front and back skirt sections, adding the pockets to the side seams, then top stitched the CF seams as before, I didn’t top stitch the CB seam at this stage as I wanted to be able to sew in a continuous line with no breaks and I couldn’t achieve this until the hem was turned up too. Incidentally, as many of the seams were going to be pressed open inside the dress I overlocked the edges of most of them first then sewed the seam and pressed open.
Next I pinned on the skirt starting by matching the centre front, back and side seams. Because I had no other markings now I played around with different positions for the pleats until I happy with how they looked. This will vary according to what size you’ve cut the waist but for mine I settled on 10cms each side of the CF seam for the first pleat and then the second and third pleats were a further 4 cms away from the previous one. I checked all the measurements to ensure that they were each symmetrical and well-balanced before I sewed it all together, overlocked to neaten and added another row of top stitching to the waist.


This just left the hem length to check, I had opted for quite a long skirt length because I wanted the dress to be a fairly loose throw-on shape but not too baggy or undefined. I was happy with the length I’d plumped for so I used the triple straight stitch once again around the bottom and then down the CB seam, creating an angled line to define the facing which finished the slit opening.


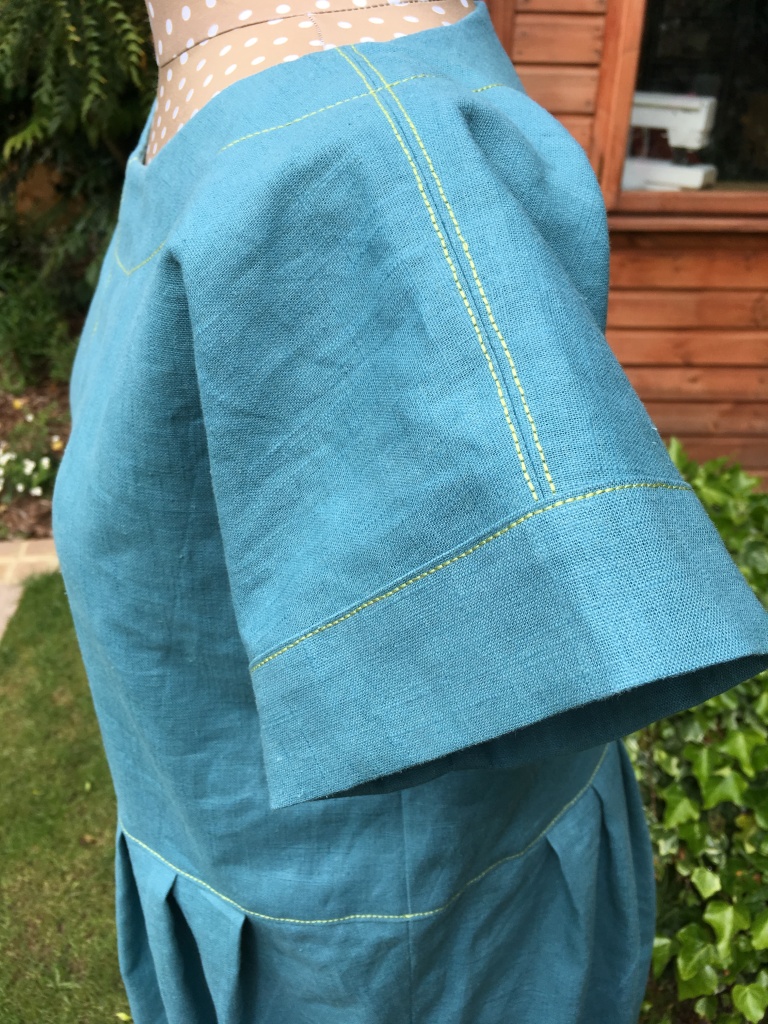


I’m not always super-happy with everything I make (and in truth I’ve positioned the pockets a little bit low in this dress) but I can’t wait to wear this dress during the summer! I’ve only ever worn my previous Zoes with long-sleeved tops layered underneath in chilly weather so it’s a bit of a revelation to realise that the sleeves are the perfect length for a summer dress. I think the skirt shape is more interesting than just a gathered dirndl and the lime-green contrast topstitching is a bit of fun. The linen is a great weight for this too, it will be crumply but that’s part of the charm of linen fabric…I think I may have to make more of this frock!
Until next time,
Happy sewing
Sue

Thanks for sharing this….it looks like the perfect summer dress. The neckline is really flattering, the sleeves cover the chicken-wings, the high waist means no tightness around the middle, the pleats give plenty of room to walk and the length suits the style. I love all the top-stitching too. I’ve got some gorgeous soft linen in my stash too, so I just need to see what patterns I can hack to make something similar.
LikeLiked by 1 person
Yup, all of the above! Thank you, I’m sure you can find a pattern or two to create this with, it’s basically an A-line skirt used upside down.
LikeLike
The dress looks really lovely on you. It looks completely different to the original pattern!
LikeLiked by 1 person
thank you
LikeLike
I love this dress! Thanks so much for the details on how you achieved the pattern. So inspiring!
LikeLiked by 1 person
I hope you’ll give it a try!?
LikeLike
What a great new dress! It looks so comfortable to wear…and I love the cardboard pocket template idea. Definitely copying that!
LikeLiked by 1 person
Thanks Carolyn, it’s such a time saver!
LikeLike
Oh., I love the lines on this one! ❤️
LikeLiked by 1 person
I reckon it qualifies as secret pyjamas too!!
LikeLiked by 1 person