
It’s a new year (apparently?) so it’s time for my next Lamazi blog and I’m sewing something for Mr Y! I don’t know about you but I’ve felt I needed to work on something a little different to most of my other recent makes, I’ve made myself some lovely garments that I’m now frustrated not to be able to wear much as I want but Tony has been in need of some new clothes for a while now so it’s his turn to be on the receiving end!
I don’t know what you think but I’ve found that men’s wear patterns and suitable fabrics are definitely a bit harder to come by than women’s or children’s, they are out there if you’re prepared to look but it’s not easy. I’ve made him some nice shirts in the past which you can read about here, and I had made him a couple of Thread Theory Finlayson sweatshirts recently and then my good friend Claire told me about their Carmanah top which was quite a new pattern. It has several options so you can individualise it, for example with full length or quarter zip, hood or collar, and with or without kangaroo pockets.

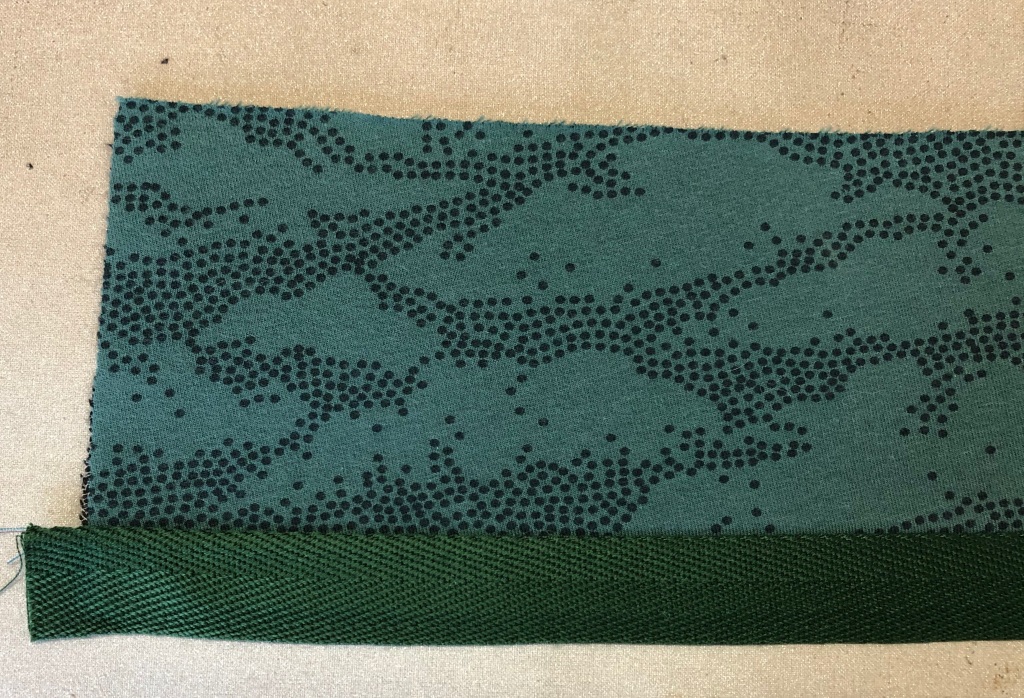
Lamazi offers a range of co-ordinating See You at Six fabrics with plain and patterned French terry, and ribbing, all dyed to be a perfect match so we chose the ‘Clouds’ design in Bistro Green.

I’ve never purchased ribbing fabric before so I was unsure how much to buy, initially I requested far too much because the pattern instructions made no sense to me. Liana at Lamazi and fellow-blogger Sharlene advised me so I had 1metre in the end to be on the safe side and that was sufficient for an adult garment. If you find yourself in a similar situation I suggest you measure the appropriate pattern pieces to get an idea, or try contacting the fabric seller and I’m sure they would be happy to advise. For an adult garment it almost certainly needs joins whilst something for a child probably wouldn’t.
Based on T’s measurements (he’s 6’3” and, although he’s lost about 28lbs during lockdown, he’s not skinny) I cut him a size large but I added about 2cms at the CF and CB folds at the bottom because the previous version was just a little snug at that point. He likes the body length which comes down to about hip level, and the sleeves are nice and long too so I didn’t need to add any length to them.
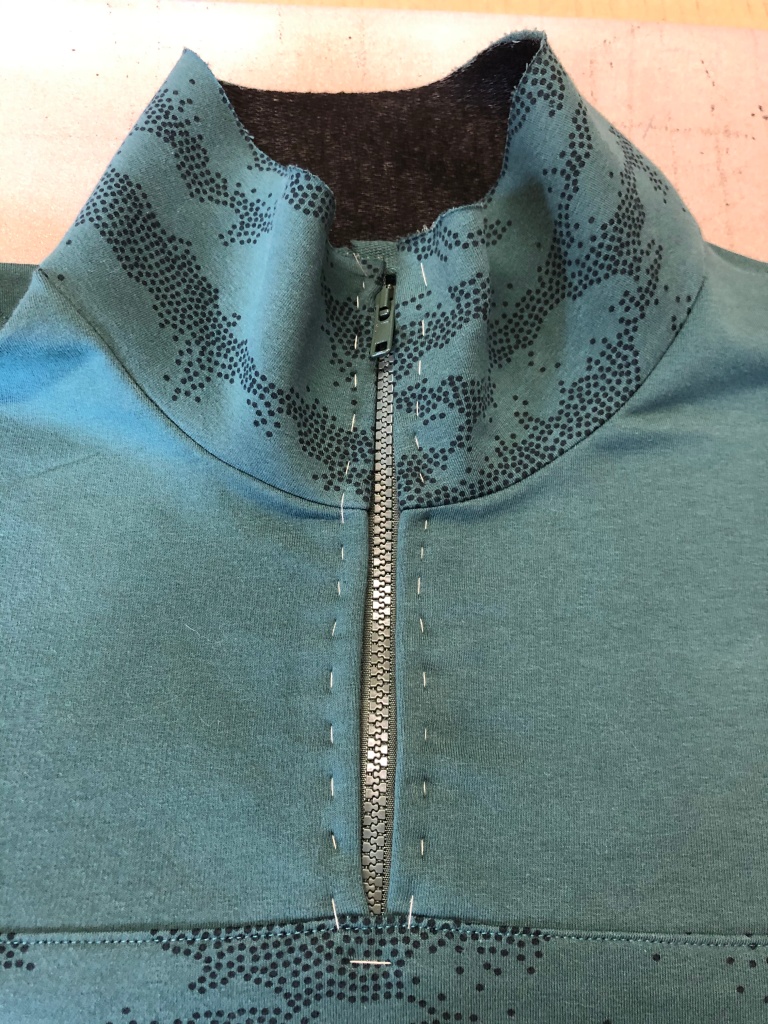
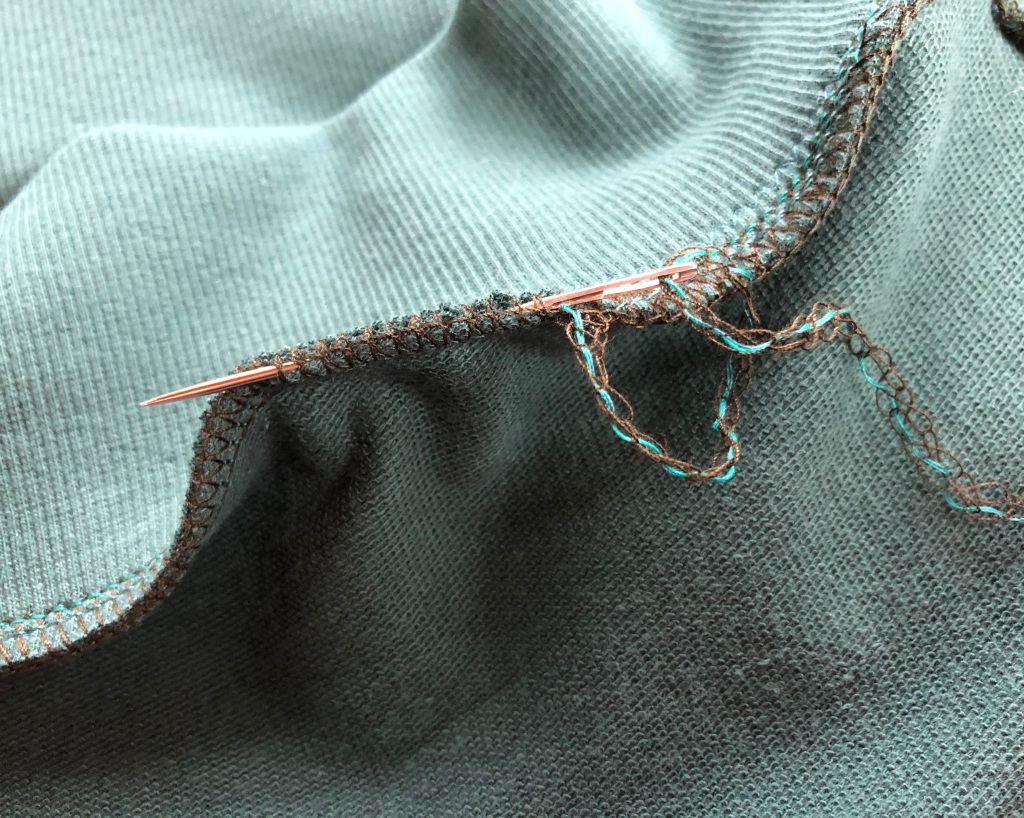
The making up instructions and diagrams are quite clear, I got into a bit of a pickle using the twill tape neatening method though, partly because I printed off the booklet a bit small so I couldn’t easily read the instructions(!) and partly because the green twill tape I had managed to buy was wider than required! Anyway, I persevered and it looks OK in the end. This tape method wasn’t essential and overlocking is perfectly satisfactory, I just thought I would try it for a nice finish on the inside, it definitely adds more complexity if you want to up-skill though. The collar version has a nice detail of the chin guard over the zip which is worth adding for a quality finish.


This fabric is quite pricey but, in my opinion, it’s really lovely quality and it sewed together beautifully. There’s just enough stretch and it would be a good weight for sweatpants or a sweater dress too if you’re tempted. This is the first time I’ve used a range of co-ordinating fabrics and the finished result is really pleasing. Equally you could mix and match colours or prints using remnants for this pattern too, because of the way it’s cut in segments, especially if you go for the full zip version.


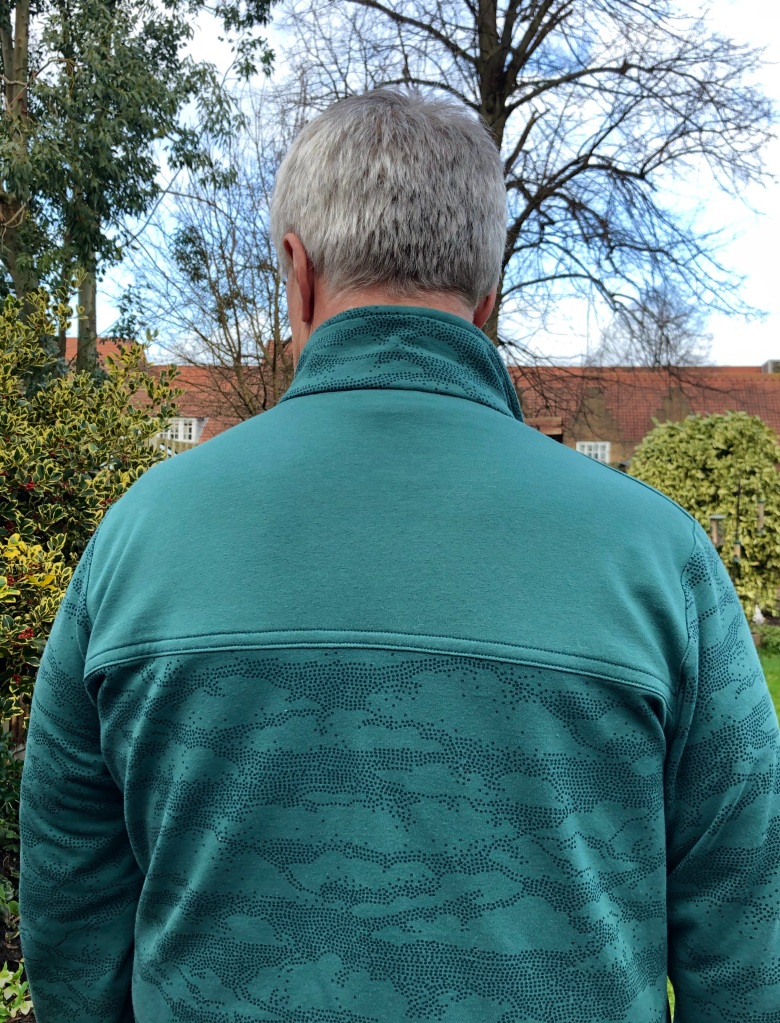


T has gallantly modelled the finished result-he’s delighted with it-he’s usually my slightly impatient photographer so the boot was on the other foot today!
Have you sewn anything for the men or boys in your life? How do they feel about it? Luckily T isn’t very demanding where his threads are concerned and he’s always been very happy with the items I’ve made him so far…..I haven’t attempted trousers in years though so perhaps that will be next? I’d interested in which patterns or fabrics for men you have been able to source, I think it’s an area for improvement in sewing terms.
Until next time, happy sewing
Sue

The shirt is quite handsome! I’ve made several things for my husband. Early on in our life together I was taking a tailoring class and made him a hand tailored 3 piece suit. I’m glad that I have the experience but it’s not anything that I would consider doing full time. In more recent years I’ve made him lounge/sweat pants, costumes for events, pj pants and button front shirts. Plus utilitarian items for our business such as speaker covers and bags for various pieces of the DJ gear. The only pattern that I remember is for the shirts and that is the men’s shirt pattern from Islander Sewing Systems. I love their patterns!
LikeLiked by 1 person
Hi Barbara, thank you for your reply, it sounds like you’ve made a lot more for your husband over the years than I have! I’m not familiar Islander Sewing Systems, I’m intrigued so I’m going to have a look.
LikeLike
That is one lovely sweatshirt, Sue, and the model looks quite pleased! I like the look of that twill tape on the inside, and your beautiful serging reminds me that I need to practice my own. I made my husband a tunic and robe (S5840) for a Star Wars costume once, as well as a vest (S1506A) for Mardi Gras. He loves getting handmade things, but he is so picky about his clothes I’m intimidated at the thought of making him something he could wear daily! I’ve also made a handful of ties for my son-in-law, and after a series of attempts, the Peek-a-Boo Patterns classic necktie, slim version was the winner. He has two of those, and is hopeful I’ll get around to making him some more in the future. That pattern is free when you sign up for their emails (at least it was when I got it), and I think it’s only $5 if you buy it.
LikeLiked by 1 person
Hi Lisa, thank you for your response. I’ve made a few neckties over the years too although always for bridal parties and never for Mr Y.
LikeLike
The sweatshirt turned out very nice, the fabric was a great choice and looks so good on your husband. I personally love the twill taped seams. I have sensitive skin and taped seams are the way to go! As for sewing for my husband, I have made lots of flannel shirts, a wool shirt and a bathrobe for him in the past. Until this past Christmas, I hadn’t ever made him pants. I made him a pair of hunter green sweats that he loves.
LikeLiked by 1 person
I love these Sue, they turned out really well and what you said about making for yourself when there is nowhere to wear the things really resonates. I’m also planning to make more for my tall guy. I must start stalking your makes more for ideas!
LikeLiked by 1 person
Have you seen Wardrobe By Me patterns for men ? I have sewn a couple of the women’s patterns and they are really nice. I haven’t sewn for my husband for years – I made shirts and trousers in our first few years together but the interest has waned after 27 years of marriage. Too much to sew for me !! There is an Australian Blogger – Five and Counting – who makes lovely things for her husband and son.
LikeLiked by 1 person
Hi Claire, yes I’ve noticed Wardrobe By Me very recently and there are some interesting patterns I thought. I might give them a whirl, I didn’t used to be a huge fan of indie patterns but these days I’m of the mindset that it’s good to explore and support some of them. I’ll have a look at Five and Counting, I’m not familiar with her, are you in Australia too?
LikeLike
I wish I was in Australia – sadly not. I’m near Milton Keynes – I came to the Sew over 50 meet up last year in London. What fun that was and who knew what was just around the corner !! Talking of Australia – I have just discovered Style Arc patterns and am loving how the sizing is spot on – no alterations needed so far and some really nice designs – just need to get beyond the sparse instructions.
LikeLiked by 1 person
Apologies for not realising you came to the meet-up, with so many people it was all pretty hectic, it was such an enjoyable afternoon wasn’t it, I do hope we can have a rematch eventually! Style Arc are another brand I haven’t tried but I like the look of some of their styles
LikeLike