
I’m very excited to have been offered a copy of one of the new Tilly and the Buttons and I jumped at the chance to try Nora, a drop shoulder jersey top with several variations of sleeve, neckline and length. It’s just the sort of top I like to wear, often layered up in colder weather so I thought you might like to know what I think about the pattern.

For once I decided I would trace off the pattern first because I’ll probably want to use several of the variations but this time I wanted to start with the long sleeve, uneven hem version.


Initially I checked my measurements against the sizing chart, and then the very useful finished garment measurements chart too. It’s always helpful if patterns have this (‘big 4’ patterns usually have them printed directly on one of the major pattern pieces) because you can make a much better judgement of the size you want. Take a tape measure and hold it around your body using the finished garment measurements to see how you feel about the fit-too loose? too tight? I opted to go down a size from the one indicated by my body measurements because I felt the finished top would be plenty big enough.
I had some lovely loopback sweatshirting in my stash that I’d bought from GuthrieGhani at last year’s one and only Great British Sewing Bee Live in London. It had been destined for a top based on one I’d seen at the Burberry ‘Capes’ show at the beginning of 2017 but never quite got made. When I clapped eyes on the Nora I knew the Burberry top would rise again.

In order to match the stripes, take your time laying up the fabric ready to cut. Ensure the stripes on the underneath layer are in line with the top layer by popping a few pins through both layers every so often. Next, I placed the front and back pieces onto matching stripes at the lower edges, double checking that the bottom of the armhole was also the same. I didn’t cut the sleeves out at this time, I waited until I had the front and back sewn together at the shoulders and the neck band attached before doing this. This way you can have your actual garment laying on the fabric next to where you’re intending to place the sleeve pattern, I cut each sleeve separately to make absolutely sure.
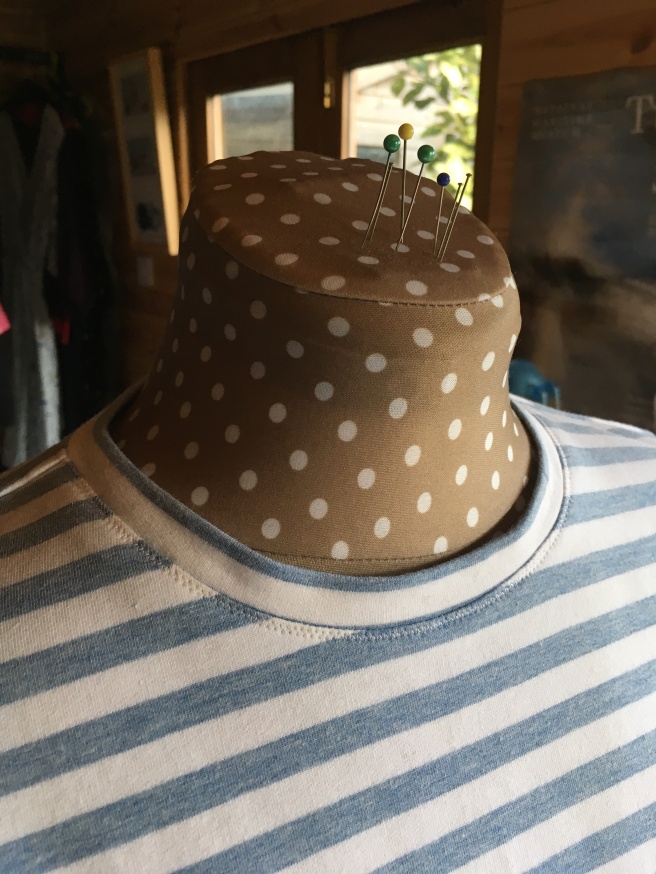
Tilly’s instructions and photos are generally very clear and helpful in my experience. I’m not sure if I did the neck band in quite the same way as the instructions but it worked and looks good. Different knits and jerseys have differing amounts of stretch so you may need to adjust the length of the band you use. I made mine shorter in the end as it wasn’t sitting flat at first, the band needed to be more stretched onto the neck edge to sit nice and flat.
The beauty of the sleeve on the Nora is that it’s a ‘shirt sleeve head’ so it’s almost flat across the top. This means it’s very simple to sew on because there’s no tricky setting into an armhole to do, you sew it on flat and then join the underarm and side seams afterwards. Incidentally, I sewed most seams using the tricot stretch stitch (looks like lightening in the symbols if you’re looking for it on your machine) You could also use a zigzag that’s very flattened out by reducing the stitch width. Alternatively, you could sew most of Nora together using an overlocker but don’t forget the seam allowances are 1.5cms and an overlocker will be much narrower which could result in a bigger garment than planned if you don’t trim them down first.
Before I hemmed the sleeves I tried the top on and opted to bring the sleeve width at the cuffs in by a total of 6cms [only as far as the elbow though from where I graded back into the original seam] Although the cuffs were a bit too wide for my liking I loved the extended length which comes some way over your hands.
That just leaves the stepped hem. I used a twin needle to sew straight across the hems and a regular ballpoint needle to turn the side seams.
Before I started Nora I’d already decided that I’d wear a shirt under the stripy version because the front is actually a bit higher than I like so, when I make my next one, I’ll lengthen the front somewhat but still keep a ’step’. I’ve been wearing it with my favourite The Maker’s Atelier Holiday Shirt underneath and I love how it looks together. I bought some beautiful Liberty fleece-back sweatshirt fabric from Fabrics Galore at the recent Knitting & Stitching show which I’ll use to make the Nora with the high roll collar instead and the long cuffs will roll back to show the contrast colour, it’s going to be so cosy. I reckon you could make it in a drapey woven fabric too BUT you’d have to make the neckline larger because you wouldn’t get your head through otherwise!!


Thank you Tilly for the chance to try out Nora, I’m definitely a fan and I think there will certainly be a few versions of her finding their way into my wardrobe over the autumn and winter…and then there will be short-sleeve versions when the spring arrives!
Until next time,
Happy sewing
Sue

Beautifully sewn, lovely fabric and great blog but the pattern….. it must be me but I just think oh yuk how haphazard does that look. The fact that you have to consider wearing another garment underneath says it all for me. Love the TATB blogs, tutorials and website but other than the Agnes I haven’t been a fan of the jersey patterns. We can’t all like the same things and it’s a great blog post, hope you don’t mind me commenting negatively on the style.
LikeLike
actually I feel that you’re commenting more on my own style than the pattern because I chose to make it that way in order to wear the shirt underneath it.
LikeLike
Not my intention to criticise your style at all and I only mentioned the underneath shirt as I would feel the same about needing to wear a shirt or similar underneath as the style of the top is not a shape that I personally think looks good on it’s own and I was commenting on my thoughts about the pattern. However I will stop commenting as I am not trying to offend and apologise sincerely if I have.
LikeLike
I appreciate your apology, thank you.
LikeLiked by 1 person
I think you look great and I don’t agree that it looks haphazard. Thank you for taking the time and effort to blog about the pattern. Keep doing what you’re doing, you’re an inspiration.
LikeLiked by 1 person
Thank you Fiona, that’s really encouraging.
LikeLike
This is one of the few blogs that gives thorough reviews with expert advice on fabric and methods that are useful for all sewers and not just for tatb fans. As your version is almost identical to the pattern photo it’s useful to have a good review.
Not all blogs are equal, yours is one I always want to read because you cover details I want to know about, I’ve bought patterns after reading your reviews, as it happens I’m trying to identify a dress pattern I’ve seen in your gallery, I will have to do a bit of digging to find the review first.
On another note, I feel that it’s uncalled for to critique style unless specifically asked, photos can’t do justice to a living moving body or encapsulate a persons character. Take an extreme example like Grayson Perry, he looks bonkers in photos but in action he’s captivating in his fabuloulocity and his unique style. And Gudrun whatsername has made an industry out of eclectic pattern matching and her stuff is joyful. It’s not what you wear but how you wear it
I see where you’re going with this look, it’s contemporary and pretty straightforward to customise. I could see it in a dark grey with a black under shirt and skinny jeans, al la All Saints, (grungy streetwear, eye-watering prices). I predict we’ll be seeing lots more of these popping up soon.
Sent from my iPad
LikeLike
Thank you, I appreciate your thoughtful comments. I always try to be honest about patterns without being either rude or sycophantic, my reviews are meant to be helpful and informative. Which dress are you trying to work out the pattern for? I can probably save you time searching!
LikeLike
Thanks for this, it’s the pale blue cotton or linen knee length dress with pockets and exposed zip and slightly flared skirt.
LikeLiked by 1 person
Ok, if it’s the dress I think you mean it was a free template pattern in Love Sewing 4 years ago. Take a look at the ‘art smock’ blog I wrote 3 years ago, or ‘it’s crumpled but I love it’ Is this it? The pattern was by Fiona Hesford and I think she has a website. I hope this is the right dress! 🤞not sure if you’ll still be able to get it though 😔
LikeLike
Absolutely love this look 😍 Thank you for a really interesting blog
LikeLike
Thank you
LikeLike
I love that people of different sizes and ages make the same pattern. Your IG and Blog are inspiring and honest. I get some great ideas from them. You really have the eye for pulling an outfit together. Thank you K xXx
LikeLiked by 1 person
Thank you so much, that means a lot 😊
LikeLike