
My first blog of 2021 features my last make of 2020. After several quiet weeks where I didn’t sew any garments, I had cut this project out a couple of months back but then hadn’t felt motivated to make them at the time…the days between Christmas and New Year was the right time to get my head around a nice involved project though. There has been so much going on in the UK recently, (understatement!) especially in these last few weeks, that I wanted something I had to concentrate on to take my mind off other events outside of my control.
If you’ve read my blog in the past you’ll know by now that I’m a big fan of Trend Patterns but these are the first trouser pattern of theirs that I’ve tried.
I saw Lucy wearing her own version of TPC12 on her stand at the Stitch Festival in London back in early March 2020 (just before everything went weird) and it was the unusual split hem detail that initially I really liked. On closer inspection there are some other nice features too, like the topstitched front seams with optional faux pocket flap, and a button fly. These are the kind of details that attract me to a pattern but I would say before I go much further that this is definitely an intermediate pattern as a result, you will need to be a confident sewer or at the very least game to increase and expand the skills you have already. Before I left the show that day I bought some nice heavier weight plain black linen from Rosenberg’s to make them with.

It was then literally months before I decided to tackle the pattern though. I’m not going to lie, and don’t judge me either, but I had piled on weight during lockdown which I wasn’t happy about and as I got bigger the last thing I wanted to do was make a pair of trousers that emphasised that fact. Eventually however I began dealing with the weight issue which in turn encouraged me to revisit the Utility trousers in the early autumn.
Instead of using the linen for the first pair I bought some grey stretch cotton twill from Backstitch near Cambridge. It’s lovely fabric for trousers and a very good quality at a reasonable price. Because the Utility’s are a fixed waistband I went by my waist measurement at that time (it was shrinking!) so I chose the UK 16 and I could tell that the hip would on the big side but that was OK.
I patiently traced off all the pieces which took a while because there are quite a number of unique pattern pieces that need to be cut right side up (RSU) Labelling them all is of paramount importance so that you don’t end up with unusable pieces of fabric cut the wrong way. Once I had cut the fabric out I left all the pattern pieces attached to the fabric until I had either interfaced them or until they were ready to be sewn. I made both my versions exactly (apart from fit alterations) as the pattern but you could leave off the pocket flap detail by cutting a pair of side fronts, or you could have two pocket flaps by doubling up those pieces instead. An advantage of having so many single pattern pieces is that you might have a more economical layplan because they will interlock better, folded fabric is a much less efficient way of cutting out, a single layer just takes a bit longer.
I said at the start that this is an intermediate pattern in my opinion and that is largely because the hem vents and the button fly are quite involved, although not actually difficult, plus I found the instructions and diagrams were a bit tricky to follow. I didn’t go wrong but they do require absolute concentration. What I’ll do in this blog, so that’s useful to you if you decide to make the trousers, is simplify the order of making down to a basic list which you can use in conjunction with the actual instruction booklet. I won’t give you specific, press here, topstitch there, instructions though, they are in the booklet and the diagrams are very detailed.
My first piece of advice, after you’ve attached all the interfacing to the relevant pieces and transferred all markings to the fabric, is to overlock all the cut edges (except the waist and fly front) first. I don’t normally do this because I prefer to overlock as I go along but it makes more sense here to do it as a batch process, just make sure you don’t trim away too much or lose your notches in the process.
Start by making the ‘pocket’ flap [make up the optional pocket bag if you are going to have one but set it aside for the moment] also, make the back darts and set the pieces aside for now.
Join the front seams for both fronts as far as the vent markers, do not join the fronts to the backs just yet. I found it easier to have only the vent sections to work on flat first although the instructions tell you to join the fronts to the backs. Once you’ve made both the vents except for the final single topstitching to hold the flap in place and are ready to turn up the hem join the fronts and backs at the side seams first. Now complete the topstitching to hold the vent in place then join the inseams, turn up the hem and topstitch to finish. [If you’re using the additional pocket bag I would add it whilst the leg is still open and flat, before sewing up the inseam. I sewed mine on earlier and it got in the way a bit when I was joining the various leg seams]

the finished vent 
faux pocket flap 
add the pocket bag when the leg is still open flat like this 
the finished pocket and flap
Pin and partially stitch the crotch seam as per the instructions then apply the outer waistband and press the seam up towards the waistband. [If you want to include belt carriers I would add them before attaching this waistband so that they are caught in the waist seam, the tops of the carriers will be enclosed when you add the facing]
Next, make the right fly section and buttonholes as per the instructions and diagrams. I’ve included a photo of where I stitched through the layers of the right front to hold them all together, I’m not sure if this is quite what is intended but it works-I couldn’t make sense of it otherwise!

Make the left fly front and attach the waist band facing, I’ve included the photo below of how this should look from the inside (yes I did use jazzy overlocking thread just because…)


Sew the remainder of the crotch seam to complete it, then sew the entire crotch seam again about 1-2mm away from the first stitching line.
Sink stitching-to complete the waistband-is simply the industry term for ‘stitch in the ditch’.
Obviously there are points where you would be advised to try the trousers on to check the fit as you go so you could do this by pinning on the stitching line (parallel, not at a right angle!) to avoid unpicking. The advantage of having a split waistband on the centre back seam (like good quality men’s trousers) is that you can fit into the small of the back more effectively.
So that’s, hopefully, a simplified method for you, it isn’t that I think the instructions aren’t good, it’s just that I got a bit confused between what was written and which diagram to follow, and that’s why I wrote it down in a clarified form as I made the second pair.
The fit of the first pair is technically not that good but they are soooo comfortable. The waist was a good fit initially although I’ve lost more weight since then so it’s very roomy now. The major issue (and I’ve read this in a few reviews) is that the crotch length is very long and looks quite droopy. You can see this in the photos of my grey pair, and this makes the cropped leg length look a bit too long as a result. For the second pair in the black linen I redrew the pattern down one size and also folded out 3cms horizontally at hip level on every pattern piece to reduce the rise. The second pair are a much better fit but that won’t stop me wearing the grey pair, it doesn’t particularly bother me that they are overly generous because the shaped waistband can’t fall off my hips anyway. Yes the grey pair are very baggy but that’s fine.


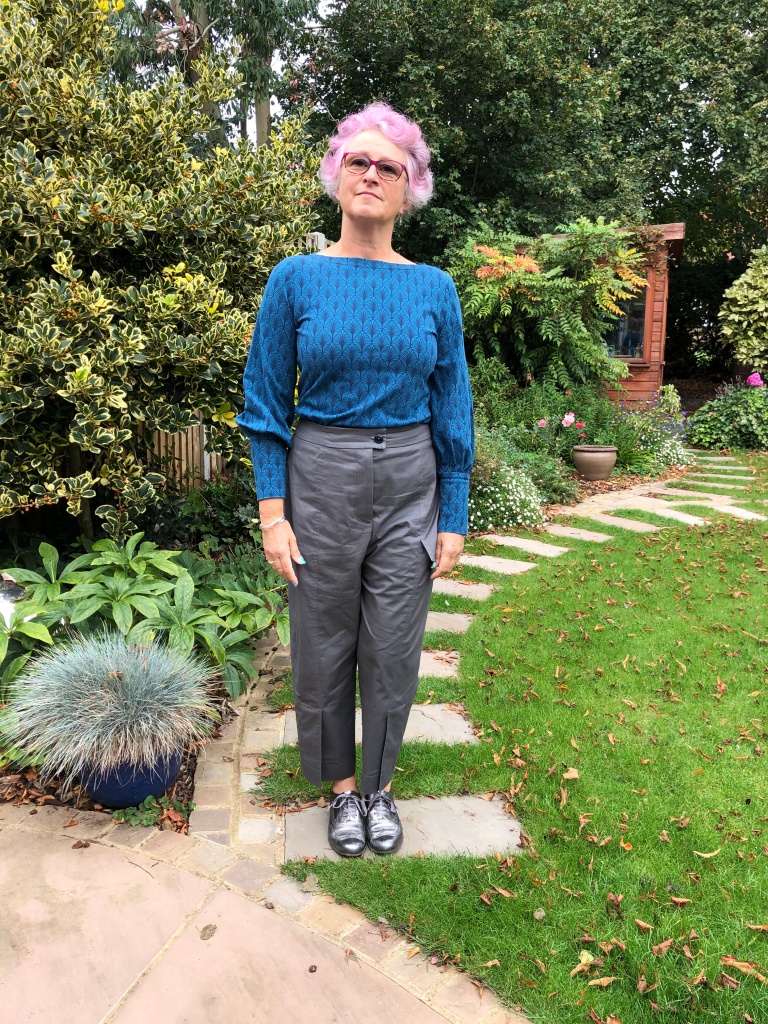
I’m wearing them with a Somerset Top by Maven, fabric bought at Ditto in Brighton ages ago. 

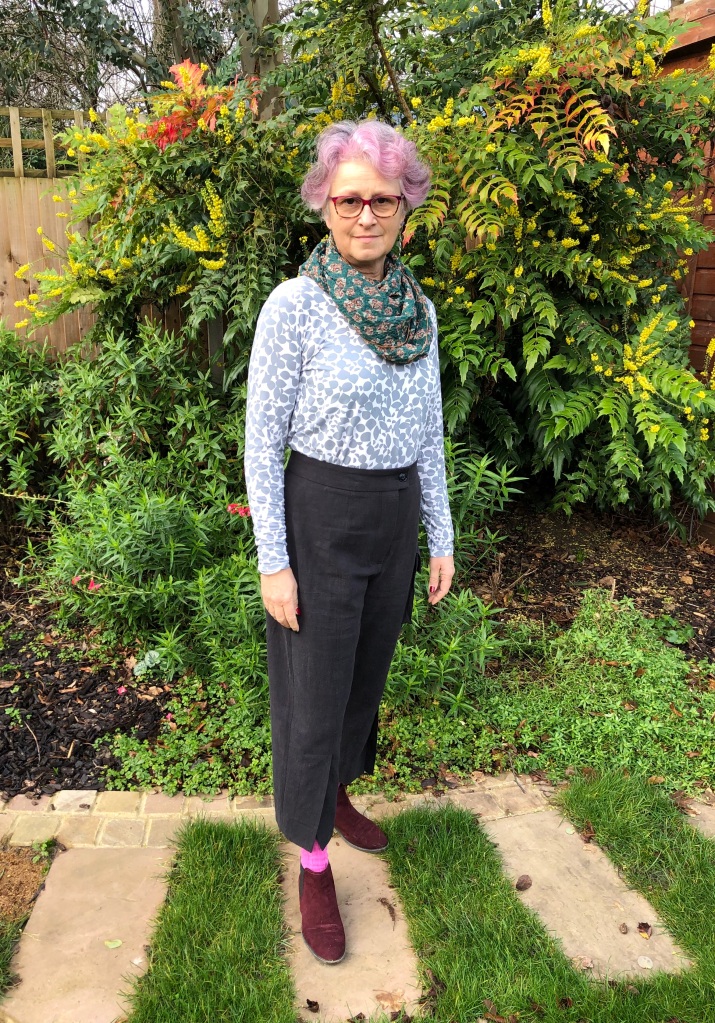
This top is the Nora by Tilly and the Buttons
The black linen pair are a better fit at the waist, there’s still plenty of room (too much room?) over the thighs but I don’t mind that. Maybe I’ll shave a little off the next pair, or maybe I won’t…


Overall I’m a big fan of the Utility trousers and I’ll probably make more, now that I’m getting better with the fit. The design details are worth the effort but it is a project you’ll want to take some time over, I had to turn off the radio so that I could concentrate completely and I read aloud each instruction several times to ensure I was going the right way. I sewed matching topstitching but you could use a contrast thread, or maybe you could line the waistband and button stand with contrast fabrics? Apart from the pocket bag if you add one there are no other pockets so you could add some in the side seams quite easily I would have thought, or patch pockets on the back perhaps? I quite fancy a pair made in chunky cord too…
I hope you find this useful, or I’m happy to try and help if I can.
Until next time, happy sewing
Sue

Thank you as ever a good and comprehensive blog. Have you ever made the Trend Patterns Raglan dress? I am waiting for fabric and pattern to arrive and wondered if you have any tips.
LikeLiked by 1 person
Thank you Christine, I bought the Raglan pattern just before Christmas but I haven’t made it yet I’m afraid. All the reviews I’ve seen suggest it’s pretty straightforward though-good luck!
LikeLike
Oooh, I have that pattern and I think I have it traced off as well. I can relate to the weight gain. This holiday season found me letting out two pairs of ratty work jeans just so I would have something comfortable to wear. I will bookmark this post for the future since one of my goals for 2021 is try out 21 new patterns (I’m sewing for others so that won’t be too hard). I may be adding this pattern onto the list. Great post and good tips on the construction.
LikeLike
Thank you Theresa, I’m glad you found it useful and I like the idea of trying out 21 new patterns, something like that can revitalise my sewing I think.
LikeLike
Hello, I stumbled across your blog – came for the sewing but have to ask about your silver shoes you are wearing in the photos with the grey pants. I’ve been looking for a similar pair recently and the silver is awesome… Do you mind sharing the brand?
LikeLike
Hi Liana, I’m afraid they are at least 5-6 years old but I originally bought them from Clarks if that’s any help?
LikeLike
I though the extra long crotch length was a key element of the style of these trousers?
LikeLike
I think you’re right Susan but it isn’t how I wanted to wear them.
LikeLiked by 1 person